
Files can disappear from Mac hard drives for many reasons, including accidental deletion, formatting, file system corruption, software errors, malware, and hardware issues. External drives can also become inaccessible after improper disconnection or unexpected power loss. Fortunately, data loss doesn’t always mean the files are gone. In this article, we explain the most reliable ways to recover deleted files from both internal and external Mac hard drives and discuss the factors that can affect your chances of success.
Table of Contents
External vs Internal Hard Drives and Data Loss
While it might seem that the only difference between internal and external hard drives is their physical location, that’s not the case when it comes to data loss and recovery. The main distinction lies in how frequently the drive is accessed and written to by the operating system:
- Internal HDDs are constantly in use by the operating system for various tasks, such as writing log files, updating system files, and managing virtual memory. This frequent activity increases the likelihood of overwriting deleted data.
- External HDDs are typically only accessed when you choose to do so, which reduces the risk of immediate data overwriting after deletion.
For the best chance of recovery, you should always stop writing new files to the affected hard drive. When dealing with an internal hard drive, experts often recommend shutting down the computer and, when possible, removing the drive and connecting it as a secondary device to another computer before starting recovery. This approach prevents the operating system from continuing to write data to the affected drive.
When you cannot remove the drive, begin the recovery process as soon as possible to reduce the risk that new data will overwrite recoverable files. Remember, every moment counts because continued drive activity can lower the chances of successful HDD data recovery.
How to to Recover Deleted Files from a Mac Hard Drive
There are several methods to recover deleted files from internal and external Mac hard drives. The right one depends on your situation: the cause of data loss, the state of the drive, and the availability of backups, etc. In the following sections, we explain how every option works so you can choose the best method for your case.
Method 1: Restore Deleted Files on Mac from Trash
It might seem obvious, but the Trash folder remains the quickest and easiest place to check after file deletion. Unless you empty the Trash manually or use a shortcut that bypasses it, macOS usually moves deleted files there instead of removing them permanently.
This method works for files deleted from both internal and external drives. Keep in mind that macOS creates a separate hidden Trash folder for each connected drive. When you open Trash from the Dock, macOS displays the contents of all available Trash folders in one place, so deleted files from an external hard drive may appear alongside files deleted from your Mac’s internal storage.
To restore files from the Trash:
- Open Trash from the Dock.

- Locate the file or folder you want to recover.
- Right-click the item and select Put Back.
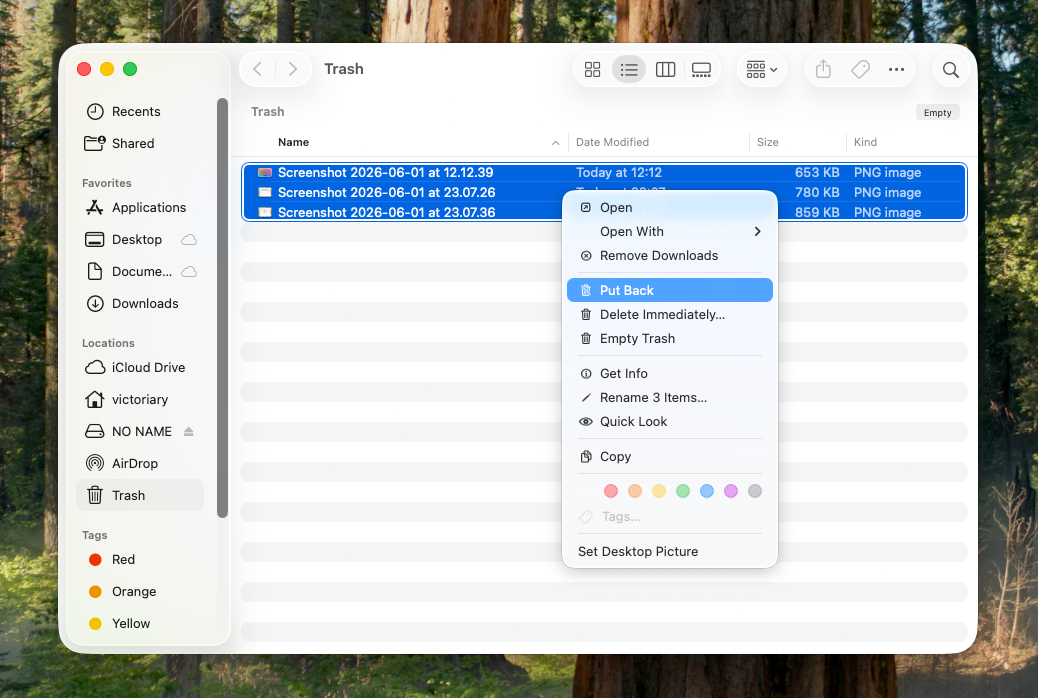
- macOS will return the file to its original location.
If you can’t find the deleted file in the Trash, the folder may have already been emptied, the file may have bypassed the Trash during deletion, or the data loss may have occurred due to formatting, corruption, or another issue. In that case, continue to the next recovery method.
Method 2: Use Data Recovery Software
If the deleted files are no longer in the Trash and you don’t have a suitable backup, data recovery software is usually the next option to try. When a file is deleted from a hard drive, macOS typically removes its file system record and marks the occupied space as available for new data. Until new information overwrites that space, software may still be able to locate and restore the deleted files.
For this guide, we’ll use Disk Drill. It supports all major Mac file systems, works with both internal and external hard drives, and can recover hundreds of file formats, including documents, photos, videos, and archives. It also includes useful features such as file previews, recovery chance indicators, and a byte-to-byte backup tool that lets you create a complete image of a drive before recovery.
To recover deleted files with Disk Drill:
- Download Disk Drill for macOS from the official website.
- Install Disk Drill on a different storage device than the one you want to recover data from. For example, install it on an external drive when recovering files from your Mac’s internal drive.
- Grant Disk Drill Full Disk Access when prompted by macOS.
- When the drive shows signs of failure, such as read errors, unusual noises, or frequent disconnections, create a byte-to-byte backup first and scan the backup image instead of the original drive.
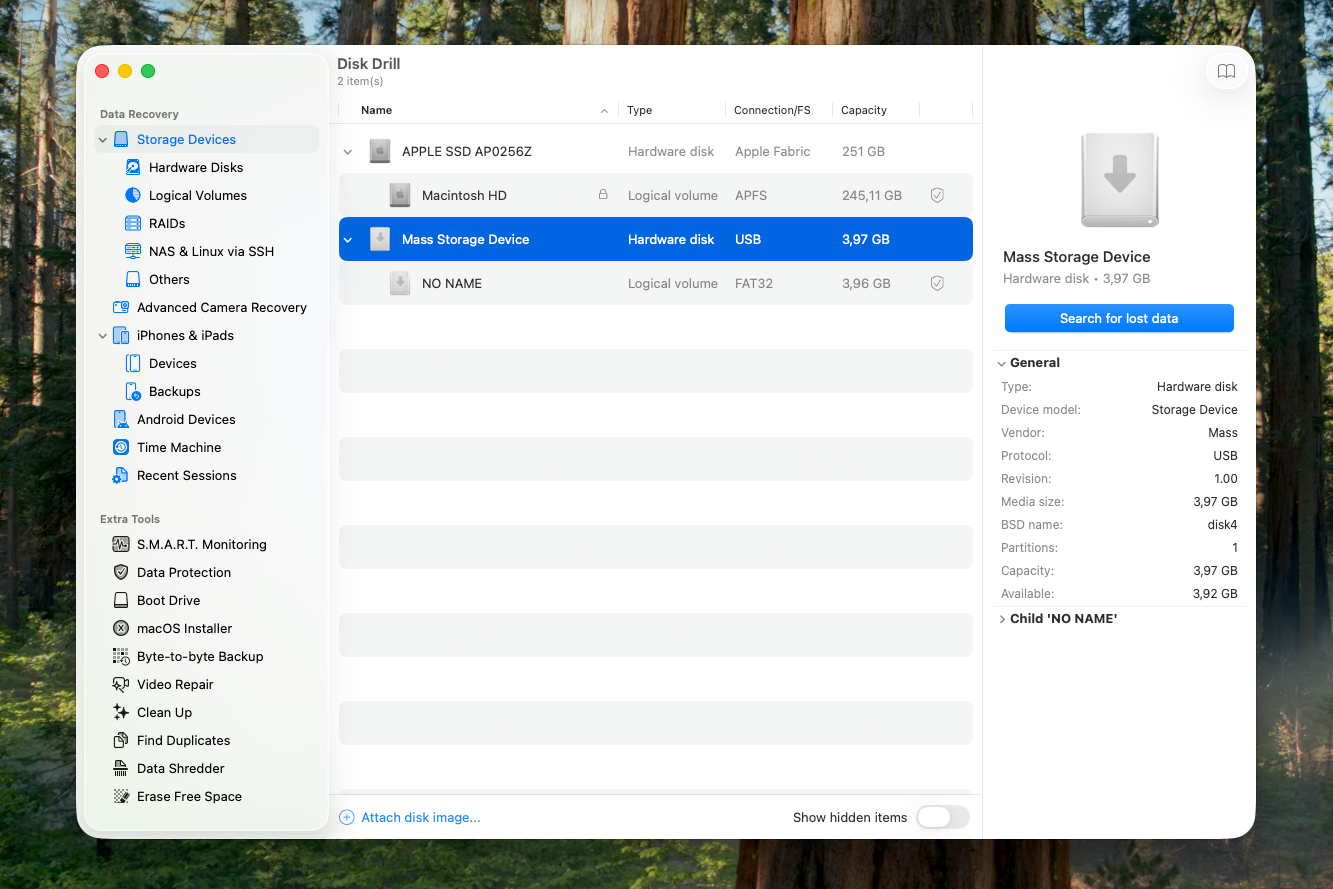
- Launch Disk Drill, select the hard drive that contains the deleted files, and click Search for Lost Data. For the most complete results, select the entire physical drive rather than an individual volume.
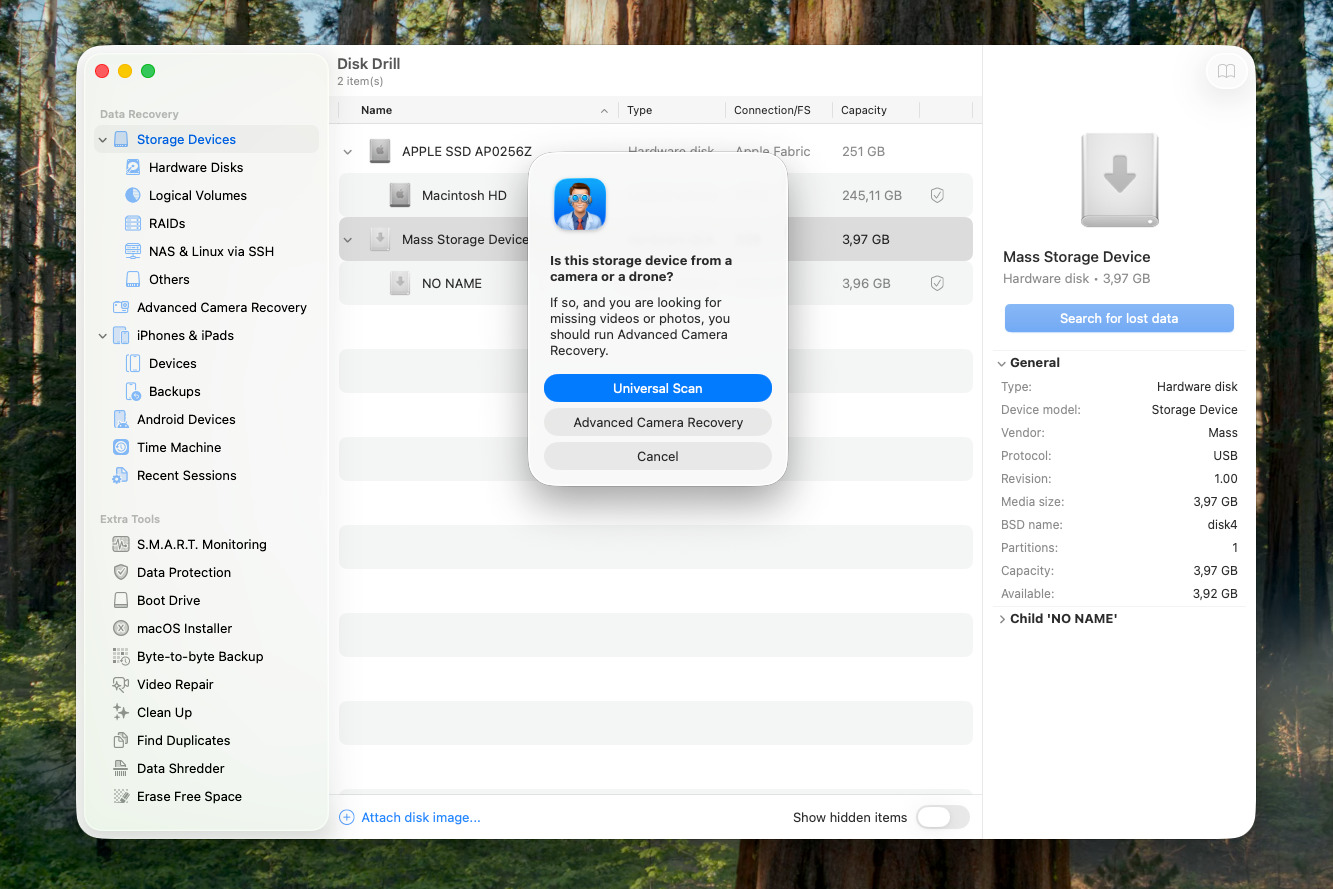
- If you’re scanning an external drive, Disk Drill may ask you to choose a recovery method. In most situations, Universal Scan is the best choice because it combines all available recovery algorithms and searches for the widest range of file types. If you’re primarily trying to recover videos from a camera external drive that stored camera footage, Advanced Camera Recovery may deliver better results because it can reconstruct fragmented media files that standard scans often miss.
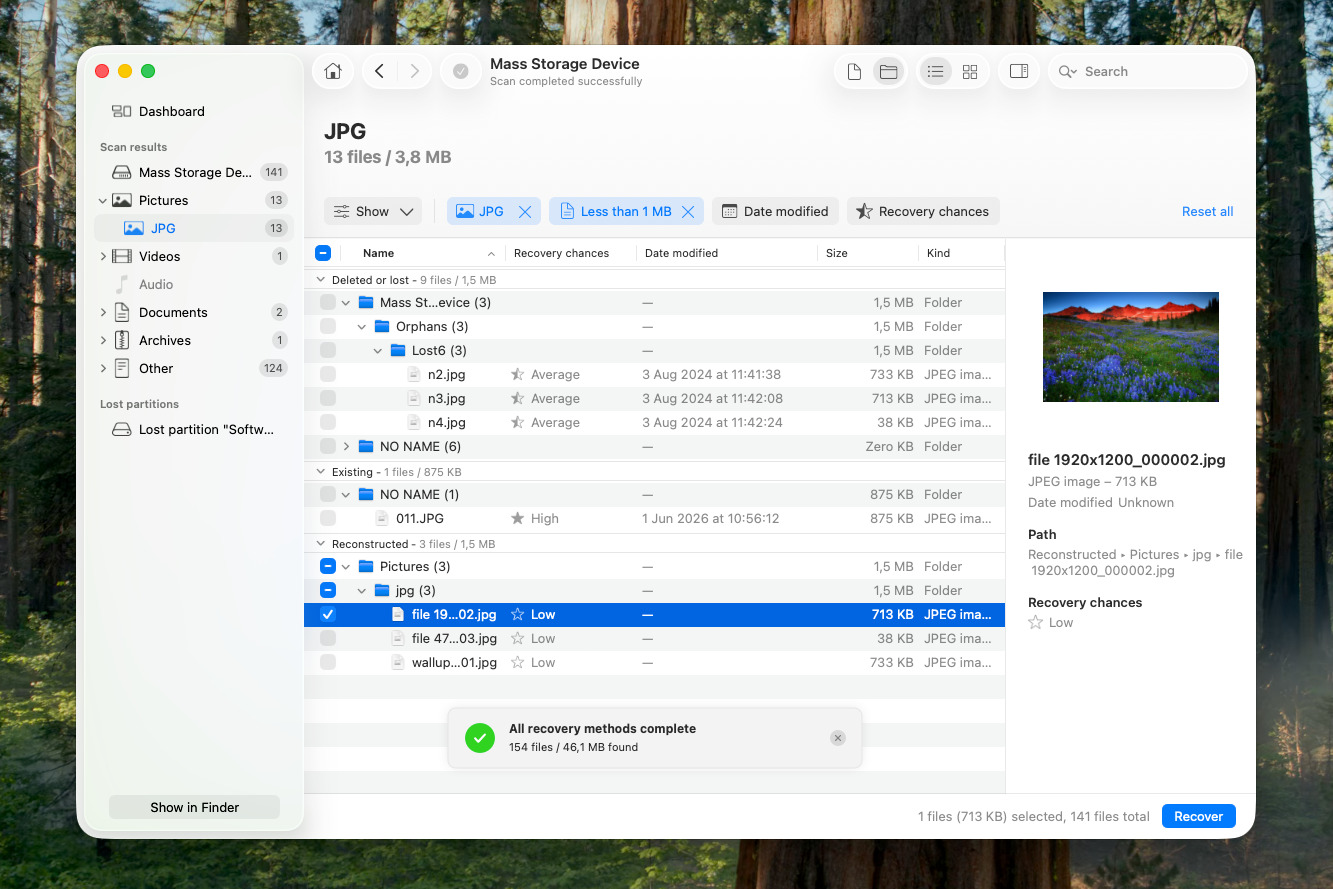
- Wait for the scan to finish and click Review found items.
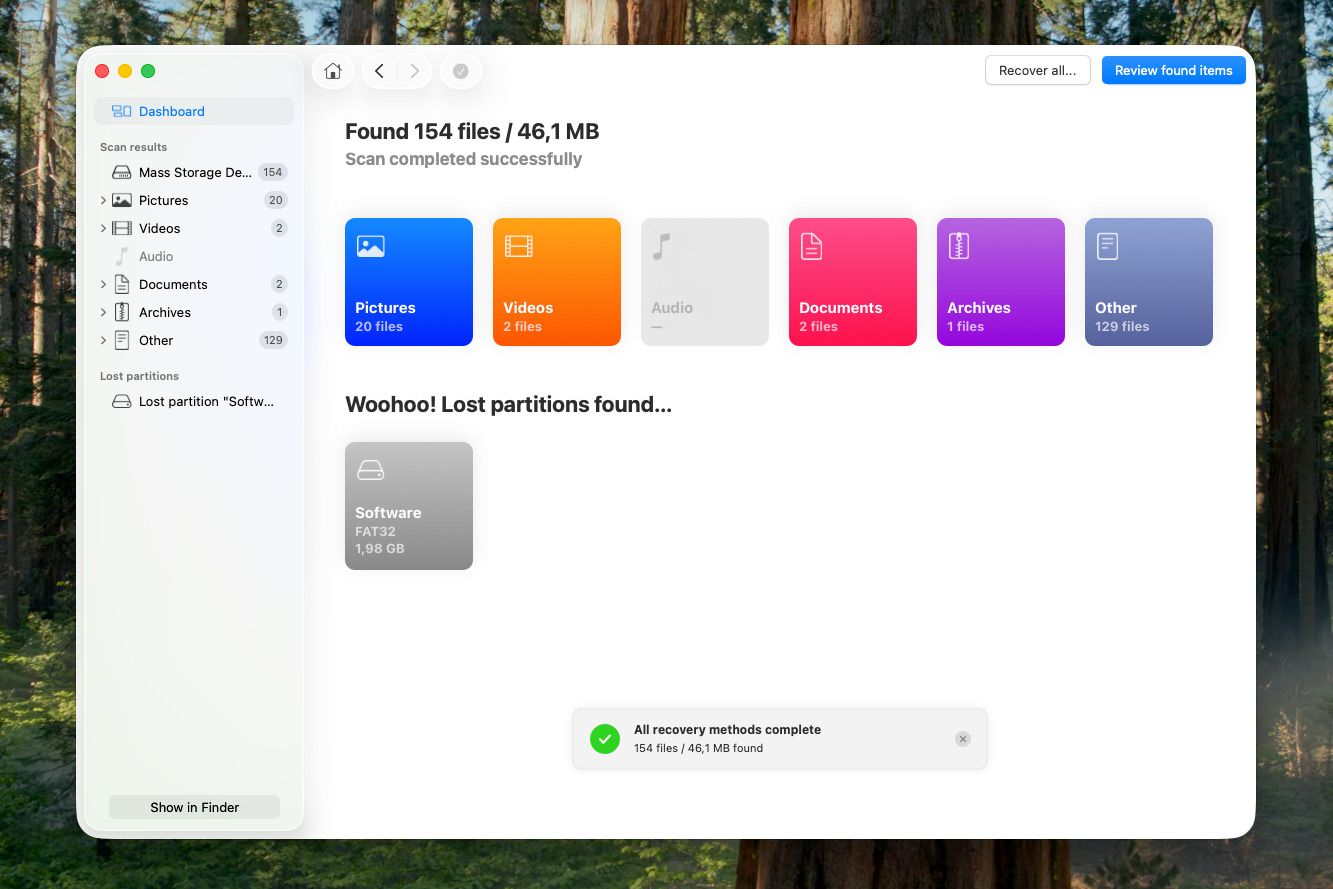
- Browse the scan results, use the search bar and filters to locate specific files, preview recoverable items, select the files you want to restore, and click Recover.
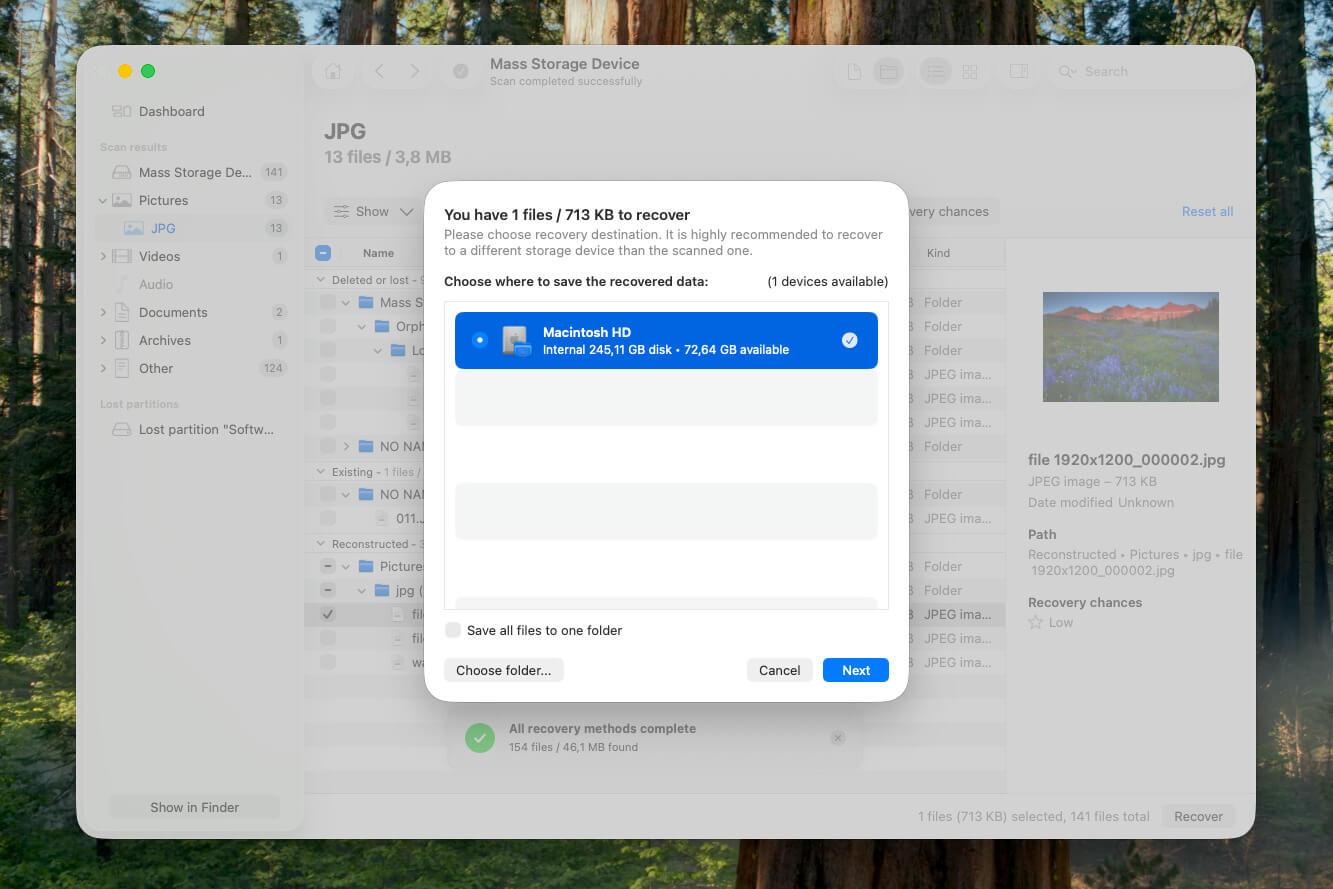
- Choose a destination on a different drive and click Next.
You can scan drives, preview recoverable files, assess recovery chances, and create byte-to-byte backups with the Mac version of Disk Drill at no cost. A Pro license is required to recover the files that the software finds.
Method 3: Recover Deleted Files on a Mac with Time Machine
Time Machine is Apple’s built-in backup and restore tool for macOS. It can help recover deleted files when a backup exists from a point in time before the data loss occurred. Time Machine primarily backs up a Mac’s internal storage, though it can also back up external drives when they have been specifically included in the backup configuration.
To restore deleted files with Time Machine:
- Open the folder where the deleted files were originally stored.
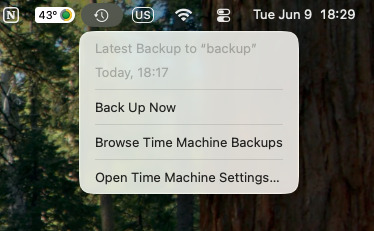
- Click the Time Machine icon in the menu bar and select Browse Time Machine Backups. If the icon isn’t visible, open System Settings > Menu Bar, then enable Time Machine in the menu bar.
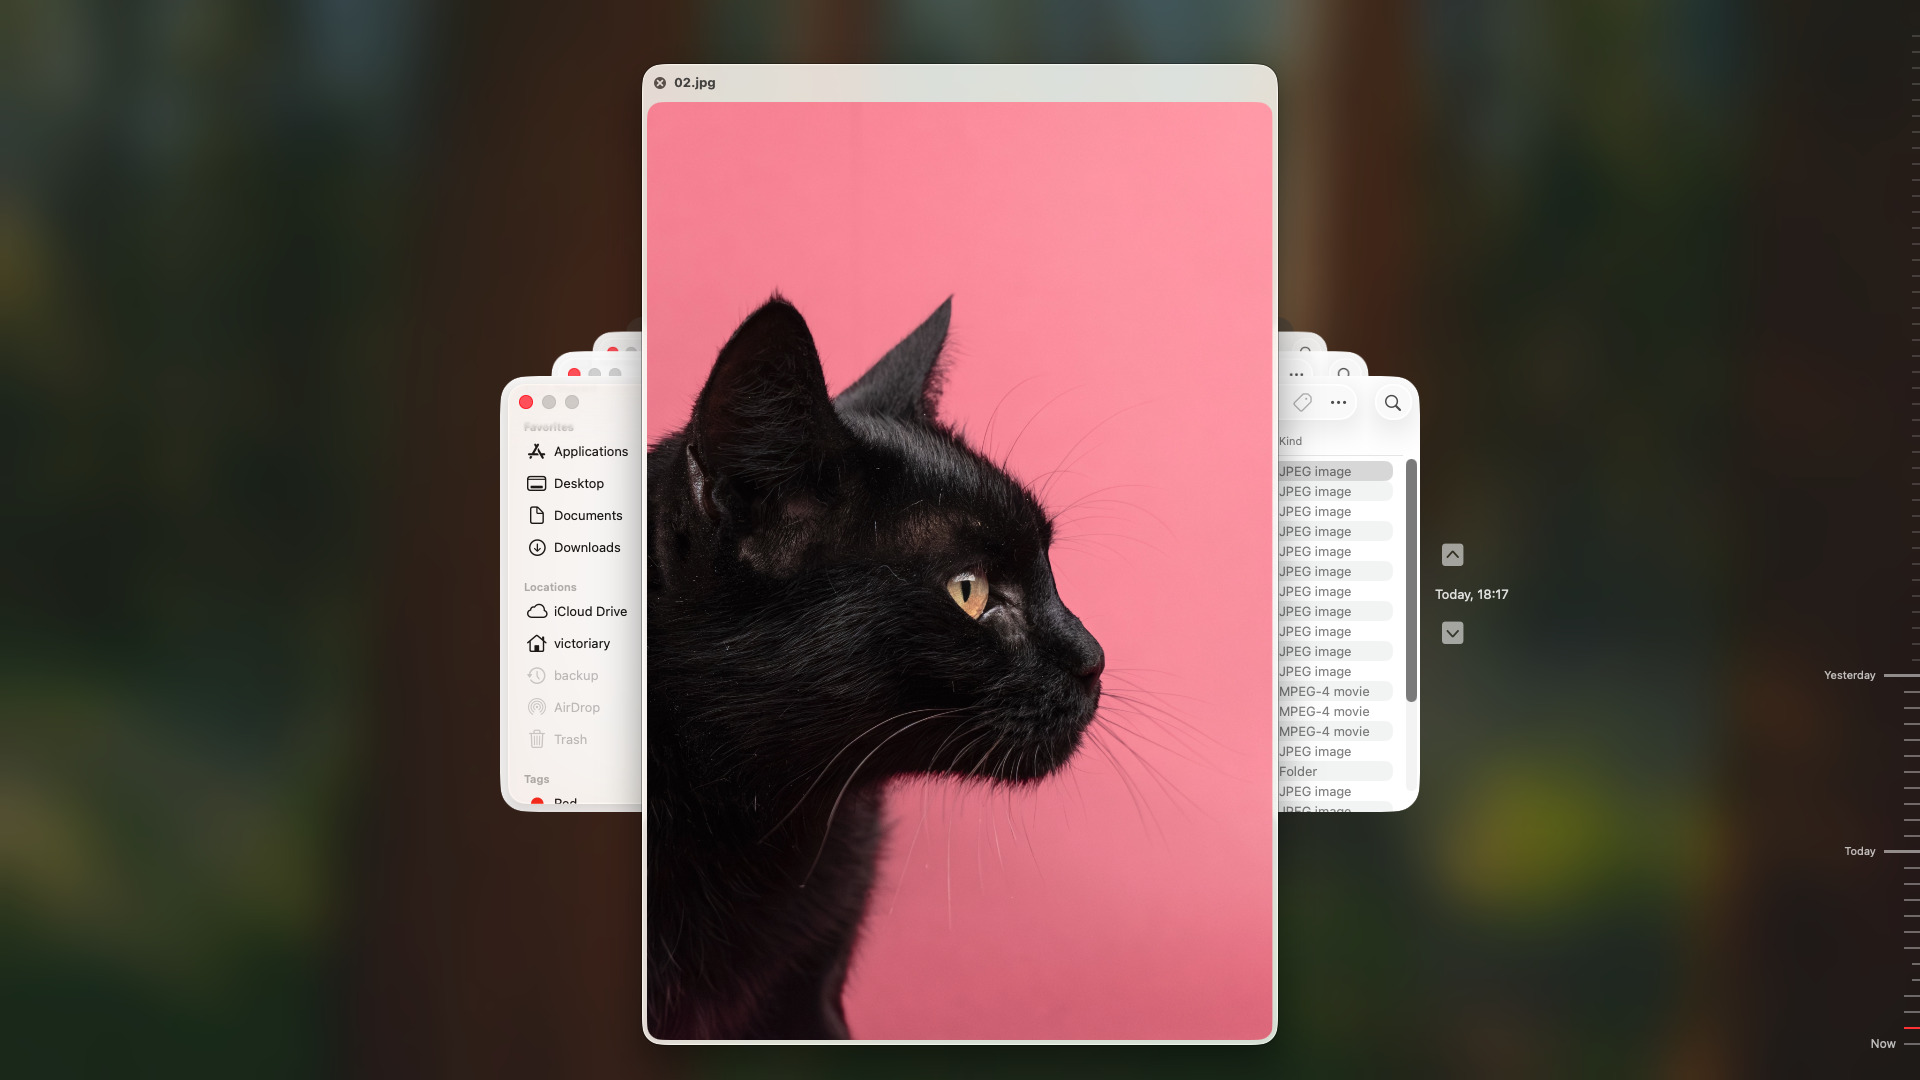
- Use the timeline or arrows on the right side of the screen to navigate to a backup created before the files disappeared.
- Select the file or folder you want to recover.
- Press the Spacebar to preview the selected item.
- Click Restore.

Time Machine will return the selected files to their original location. If no suitable backup is available, proceed to the next recovery method.
Method 4: Use Professional Data Recovery Services
There’s a limit to software-based recovery. Even the best recovery tools sometimes cannot reach the data when a drive is physically damaged, suffers serious electronic failure, corrupts firmware, or is suffering from widespread media degradation. In these cases, professional data recovery services are typically the safest and most effective choice.
Common signs that professional help may be necessary include:
- The drive doesn’t appear in Disk Utility.
- The drive makes unusual clicking, buzzing, or grinding sounds.
- The Mac fails to detect the drive consistently.
- The drive disconnects repeatedly during use.
- Data recovery software cannot complete a scan because of severe read errors.
- The data is extremely valuable and cannot be replaced.
Professional recovery companies use specialized hardware, proprietary tools, replacement components, and certified cleanroom facilities that allow technicians to repair damaged drives and extract data directly from storage media. Most consumers cannot access these capabilities, and standard software cannot replicate them.
When choosing a recovery service, look for:
- A certified cleanroom environment.
- A free evaluation or diagnostic assessment.
- A “No Data, No Charge” policy. For example, the CleverFiles Data Recovery Center (the same company who created Disk Drill) has a “No Data No Charge” guarantee.
- Transparent pricing based on the complexity of the recovery rather than the amount of recovered data.
- Positive customer reviews and a strong recovery track record.
The recovery process usually begins with an evaluation of the drive. After technicians determine the cause of failure and estimate recovery chances, you’ll receive a quote and decide whether to proceed. Typically, once the recovery is complete, the recovered data is returned on a separate storage device instead of the original drive.
Can You Recover Data From a Corrupted or Damaged Hard Drive?
Yes, data recovery is often possible even when a hard drive becomes corrupted or inaccessible. However, the recovery approach depends on whether the drive is external or internal and whether the problem is logical (file system corruption, RAW volume, or accidental formatting) or physical (hardware failure).
The most important rule is to stop using the affected drive immediately. Continued use can overwrite recoverable data or worsen existing damage.
Recover from a Corrupted External Drive
External drives are often easier to recover than internal drives because they can be disconnected and examined on another computer. When the drive still appears in macOS or data recovery software, creating a byte-to-byte backup before recovery is a good precaution, especially when the drive shows signs of instability.
A byte-to-byte backup creates a sector-by-sector copy of the drive, including deleted data and file system information. After the backup is complete, you can scan the image instead of the original drive, which reduces additional wear on potentially failing hardware.
To create a byte-to-byte backup in Disk Drill:
- Connect the external drive to your Mac.
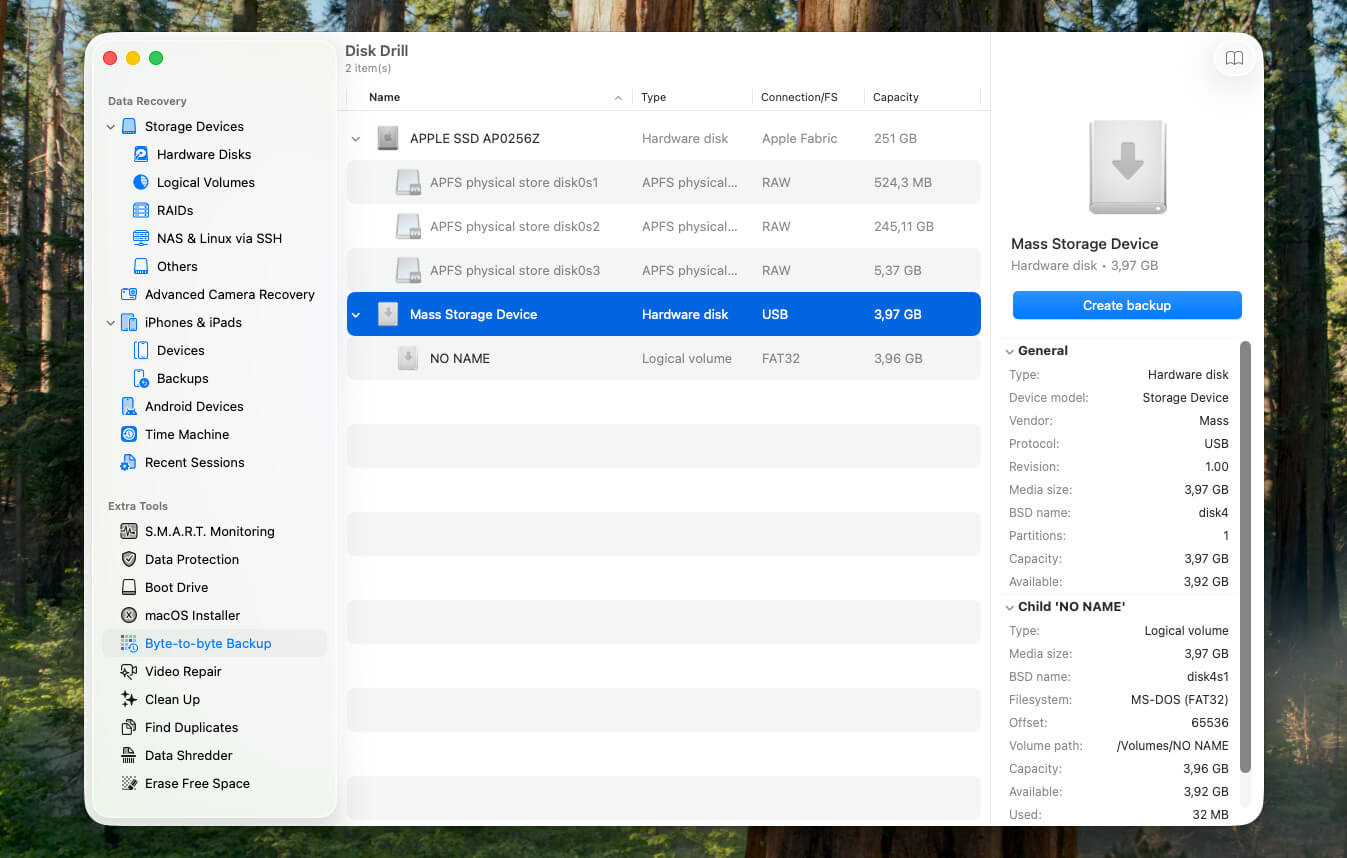
- Open Disk Drill and select Byte-to-byte Backup from the left sidebar.
- Select the affected drive and click Create backup.
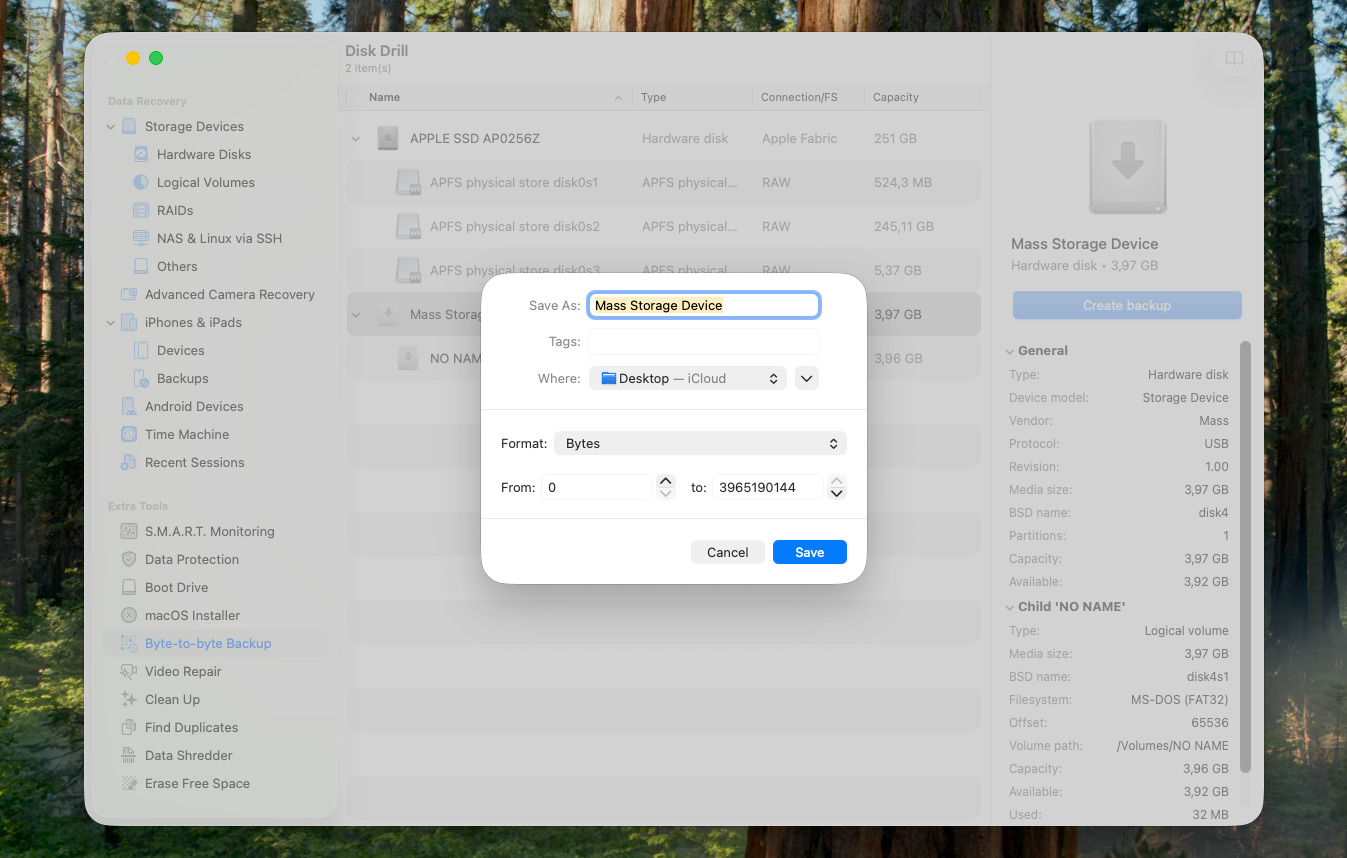
- Enter a file name and choose a save location for the backup. Save the image to your Mac’s internal drive or another healthy storage device, not the affected external drive.
- Click Save and wait for the backup process to finish.
- Return to the main window, click Attach disk image…, and select the backup you created.
- Scan the disk image and recover the files you need to a different storage location.
Recover from a Corrupted Internal Drive
Internal drives often require a different approach because they typically contain macOS and system files. The best recovery method depends on whether the Mac still starts and how severe the problem is.
Method 1: Scan the Drive with Disk Drill in Recovery Mode
If your Mac won’t boot, you may still be able to recover data through macOS Recovery.
- Start Recovery Mode. On Intel-based Macs, hold Command + R during startup. On Apple Silicon Macs, press and hold the power button until Loading startup options appears, then select Options and click Continue.
- In the recovery environment, open Utilities > Terminal.
- Enter the following command and press Return:sh <(curl http://www.cleverfiles.com/bootmode/boot.xml)
- Disk Drill will launch and allow you to scan the internal drive for recoverable data.
Method 2: Connect the Mac to Another Mac
If you have access to a second Mac, you can access the affected Mac’s internal storage through Target Disk Mode on Intel Macs or Share Disk on Apple Silicon Macs.
- Connect both Macs with a compatible Thunderbolt or USB-C cable.
- On an Intel Mac, shut it down, then start it while holding T until the Target Disk Mode screen appears.
- On an Apple Silicon Mac, hold the power button until Loading startup options appears, then select Options > Continue and open Utilities > Share Disk.
- Select the internal drive and click Start Sharing.
- On the working Mac, locate the shared drive in Finder.
- Copy important files or scan the drive with data recovery software.
Method 3: Remove the Drive and Connect It Externally
Some older Macs allow physical drive removal. After removal, place the drive into a compatible enclosure and connect it to another Mac. If the drive mounts successfully, copy important files immediately. If it doesn’t mount, scan it with data recovery software.
This option is generally available on:
- Most MacBook Pro models from 2012 and earlier
- Many older iMac models with removable SATA drives
- Some pre-2014 Mac mini models
- Mac Pro tower systems
Most modern Macs, including Apple Silicon systems and most MacBooks released during the last decade, use soldered storage that cannot be removed for recovery.
If none of these methods work, or the drive shows signs of physical failure such as clicking sounds, repeated disconnections, or complete detection failure, a professional data recovery service is usually the safest option.
Final Recommendations
Start with the least invasive recovery options. Check the Trash folder first, then look for a suitable Time Machine backup. These methods are quick, safe, and completely free.
If no backup is available, data recovery software is usually the next step. Disk Drill can recover deleted files, restore data from formatted drives, and scan corrupted volumes. When a drive shows signs of instability, create a byte-to-byte backup before recovery and scan the backup image instead of the original device.
Internal drive recovery may require Recovery Mode, Share Disk, or Target Disk Mode. When the drive has physical damage or cannot be detected at all, professional recovery services often provide the best chance of retrieving important data.


")